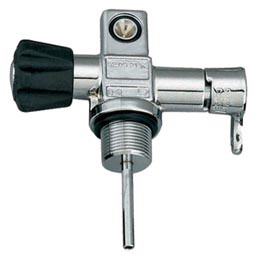
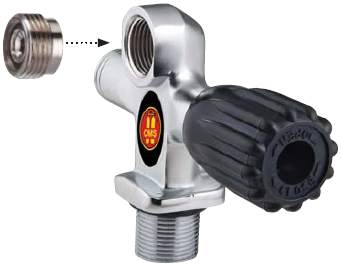
Valve Overhauls For Scuba Diving Tanks
Ensuring your cylinder is well maintained includes doing a valve overhaul from time to time. The frequency of this varies from manufacturer to manufacturer. Using genuine, high quality parts, is also very important in maintaining the integrity of your valves and your cylinder.
For best performance, all valves should be checked & service if needed annually. If the valves are not worn, all parts can be lubricated where needed, and reused. Limiting the cost of each servicing. An exception to this is the copper crush washer & burst disc. The copper crush washer or burst disc must be replaced when the bonnet or burst disc screw is removed from the valve or every five years when a Hydro test is performed.
PRE-TEARDOWN INSPECTION:
1. Start with full working pressure in cylinder and a properly functioning regulator attached to outlet.
2. Slowly turn valve on fully, and then back a quarter-turn.
3. Remove all hand wheels.
4. Apply a soap and water solution to the valve stem area, the inlet neck O-ring area, the burst disc plug and outlet.
5. Allow the soap solution to settle for at least 15 seconds, and check for signs of leakage. If leaks are found, pay particular attention to these areas and note.
6. Turn the valve off with moderate force. Remove the regulator from the valve. Apply a soap solution to the valve outlet and check for leakage.
7. Empty the air from the cylinder and thoroughly rinse the soap solution from the valve with clean, fresh water. Blow or wipe dry.
DISASSEMBLY
1. If there are no signs of leakage at the burst disc location, we do not replace the burst disc at the annual inspection. The burst disc assembly, the plug assembly and washer, and all O-rings must be replaced at each five-year tank hydro interval.
2. To simplify disassembly, we loosen bonnet nut while valve is still in tank.
3. Remove valve from tank.
4. Remove bonnet nut / seat assembly.
5. Remove the copper gasket and discard it.
6. Use compressed air to blow the orifice chamber and plug threads clean.
7. The plug assembly can be reused if no outlet leakage was found during the pre-tear-down pressure test (valve turned off with moderate force). At five year interval, the burst disc assembly must be replaced.
8. If outlet leakage was found, replace the plug assembly and inspect the orifice closely for nicks on the sealing surfaces.
9. Remove the stem from the bonnet nut.
10. If the leakage occurred at the stem, replace the O-ring and the packing washers. Visually inspect the stem for straightness, and replace if it is bent.
11. If there is no leakage at the stem and the O-rings appear unworn and undamaged, the O-rings and packing washers may be cleaned, well lubricated using a recommended product, and reused.
NOTE: if this is a five year hydro inspection,
O-rings,washers and Burst disc assembly must be replaced.
ASSEMBLY
1. Apply Cristolube grease to the plug assembly at threads.
2. Use the stem to install the plug assembly finger tight into the valve body until it touches the orifice.
3. Install a new copper crush gasket.
4. Reinstall the lubricated stem assembly partway into the bonnet nut.
5. Install the bonnet nut into the body, using the protruding slot of the stem to engage the tang of the plug assembly before tightening.
6. Stem packing nut should turn easily all the way down. If binding occurs, check for proper tang engagement.
7. Remove old tank O-ring from valve. Clean the O-ring groove and the threads of the valve body inlet with a dry cloth.
8. Lightly lubricate a new tank O-ring and install it.
9. Apply a Cristolube grease to the first three inlet threads of valve, and install the valve into the tank.
10. Tighten the valve into the tank to 40-50 ft. lbs. of torque.
11. If a new burst disc assembly is installed, tighten to 50-55 in. lbs. See burst disc procedures.
12. Apply Cristolube grease to the threads of the stem.
13. Install the washer, hand wheel, spring and stem nut.
14. Turn stem nut until the end of the stem is flush with the top of the nut.
15. Refill cylinder and test for leaks.
VALVE BURST DISC ASSEMBLIES
Safety working pressure is stamped on the hex of safety plug assembly.
Tighten safety burst disc to 50-55 in. lbs. Apply torque rapidly to avoid gasket deformation.
Important:
1. The entire burst disc assembly must be replaced every five years at tank hydro interval.
2. Never reuse any parts of the burst disc assembly, since used parts may not function properly at pressure


